|
|
#1 |
|
Участник
|
powerobjects: Field Service Mobile App: Set up and Configuration for Dynamics 365 Online
Источник: https://www.powerobjects.com/2018/01...cs-365-online/
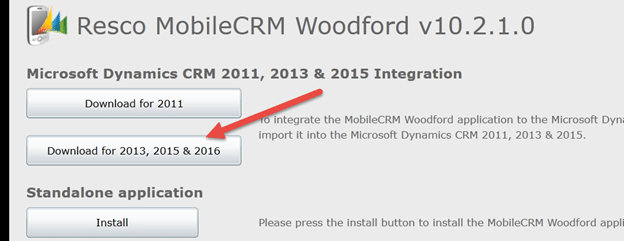
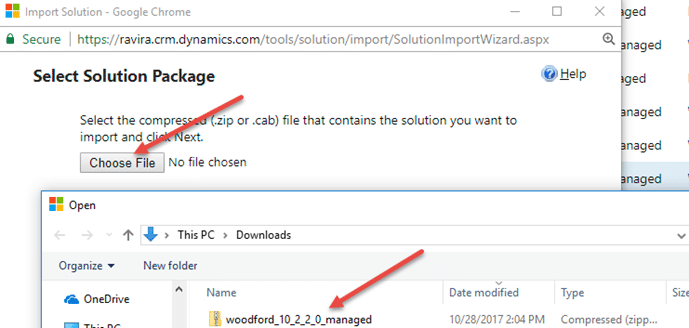
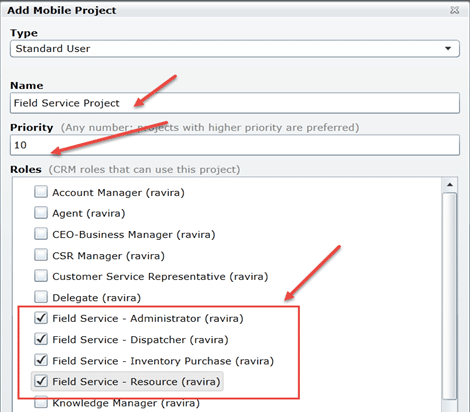
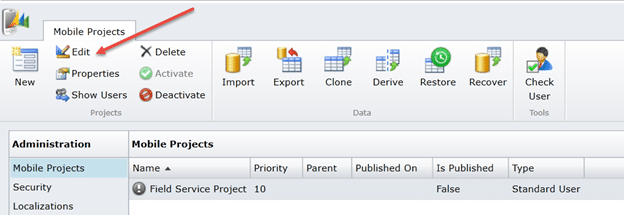
==============  The Dynamics 365 for Field Service mobile app is available as a free download in app stores. For this mobile app to work with Dynamics 365 Online, certain Resco/Woodford solution installations and configurations are needed. In this blog, we will discuss the install and set-up of a Resco Mobile CRM Woodford solution and the set-up of the Field Service Mobile project. Once the setups are completed, users of the Field Service mobile app will be able to connect it with their Dynamics 365 Online accounts. The following three steps are needed for this connectivity to happen. Step 1 Download and install the Resco Mobile Dynamics 365 Woodford mobile solution. 1. In an Internet Explorer browser, go to: http://www.resco.net/mobilecrm/woodford.html Please note: Microsoft Silverlight is needed for viewing this page which will work in the IE browser but not in Chrome or Edge When the page opens it will look like this:  2. Click on Download for 2013, 2015 & 2016, this will download a Woodford managed .zip file to your download folder. 3. Navigate to Settings in your Dynamics 365, then click on Solutions under Customization (see arrow below in the picture).  This will open ‘All Solutions.’ Click on the Import icon as shown below.  4. After clicking import, a pop up window will open. Click on choose file to select the Woodford managed zip file that was downloaded earlier. Then click Next.  This will take a short time to import and upon successful completion, you will get a message “The import of solution: Resco MobileCRM Woodford Completed Successfully” as shown below.  5. After a successful install, you will need to validate the following: In the solutions folder, you will see Resco MobileCRM Woodford version as shown in picture below (version 10.2.2.0 as of this writing).  Additionally, you will see in Settings a new header called ‘MobileCRM’ with options, Woodford, Inspections, Mobile Auditing as shown below. This further indicates the install was successful.  6. Now click on Woodford option and you will get a request (pop up window) to increase quota, increase the quota to 300 and click OK as shown below  7. You will be asked to register the user, enter the needed details and click Register. You have now successfully installed the Woodford solution! Step 2 Import the field service mobile project template into the Woodford solution. Now we will need to download a template that will help us configure the mobile app. This template contains all customizations for the field service mobile app. We can use it to add, remove, change fields, entities, views, and forms. 1. For Microsoft Dynamics 365 Online, use this mobile project template. Upon clicking this hyperlink, you will be prompted to take action on CentaurusStoreVersion.woddford file. Click Save.  2. Within Dynamics 365, go to Settings > Woodford, and then click Open MobileCRM Woodford. You will get a window like the one shown below, click Import here.  3. Select and open the CentaurusStoreVersion.woodford file that was downloaded earlier. You will be prompted with an Add Mobile Project pop up window. 4. Provide Name, Priority and for roles, check the field service boxes as shown below, then click Ok.  5. You will now need to click Edit.  6. Select Publish All, and then click Publish as shown below.  Step 3 Install the mobile app 1. Open the App store in your device and search for ‘Field Service – Dynamics 365.’ You will see the app with the truck logo as shown below. (do not select Resco or FieldOne Sky apps) Then click to install the app in your device.  2. After installing on your device, open the app to establish a connection to the Dynamics 365 servers. 3. After the app opens, in the home page, click Setup. In the setup page, go to the Dynamics 365 field to enter your Dynamics 365 URL and user credentials (see picture below for home page, setup page, and sync page). Click sync. This will enable your mobile device to establish connectivity with Dynamics 365 servers.  Now you’re all set up! For more helpful Dynamics 365 tips and tricks check out more of our blog posts! Learn more about how PowerObjects can assist you with Dynamics 365 for Field Service. Happy Dynamics 365’ing! Источник: https://www.powerobjects.com/2018/01...cs-365-online/
__________________
Расскажите о новых и интересных блогах по Microsoft Dynamics, напишите личное сообщение администратору. |
|
|